


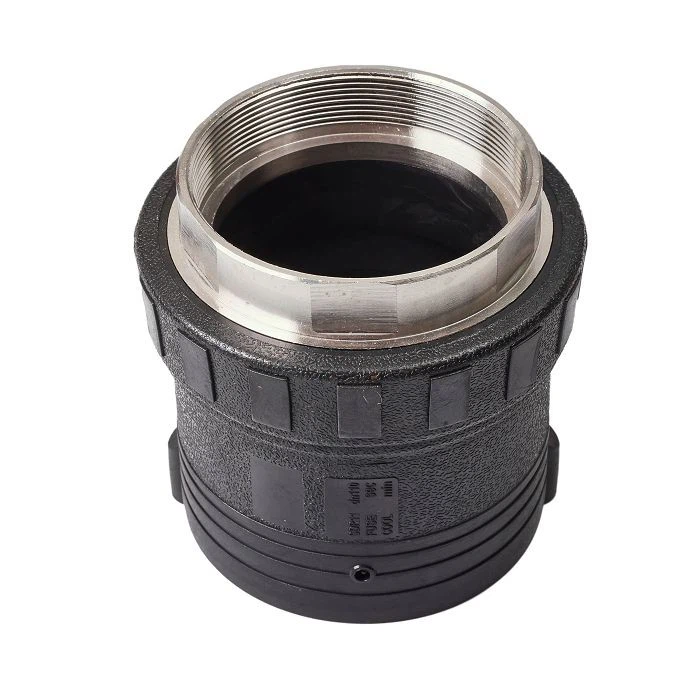
Poly flange adapters are essential components in various piping systems, providing a reliable connection between different types of pipes or equipment. Over time, these adapters may require replacement due to wear and tear, damage, or the need for an upgrade. As a trusted Poly flange adapter supplier, I understand the importance of a smooth replacement process. In this blog post, I'll guide you through the steps of removing a Poly flange adapter for replacement.

Step 1: Gather the Necessary Tools and Safety Equipment
Before you start the removal process, it's crucial to gather all the tools and safety equipment you'll need. Here's a list of items you should have on hand:
- Wrenches: Depending on the size of the flange adapter, you'll need a set of adjustable or fixed wrenches to loosen the bolts.
- Pipe cutter or saw: If the adapter is connected to the pipe using a permanent joint, you may need a pipe cutter or saw to cut the pipe near the adapter.
- Safety glasses: Protect your eyes from any debris or particles that may be released during the removal process.
- Gloves: Wear gloves to protect your hands from sharp edges and chemicals.
- Safety boots: Ensure your feet are protected from any falling objects or spills.
Step 2: Shut Off the System and Release Pressure
Before you begin removing the flange adapter, you must shut off the system and release any pressure in the pipes. This step is crucial to prevent any accidents or injuries. Here's how you can do it:
- Locate the shut-off valve: Find the valve that controls the flow of fluid or gas in the system and turn it off.
- Release the pressure: Open a valve or a drain plug to release any pressure in the pipes. Make sure to do this slowly to avoid any sudden releases of pressure.
- Check for residual pressure: Use a pressure gauge to check if there is any residual pressure in the pipes. If there is, continue to release the pressure until it reaches zero.
Step 3: Remove the Bolts and Nuts
Once the system is shut off and the pressure is released, you can start removing the bolts and nuts that hold the flange adapter in place. Here's how you can do it:
- Identify the bolts: Locate the bolts and nuts that connect the flange adapter to the pipe or equipment.
- Loosen the bolts: Use a wrench to loosen the bolts and nuts. Start by loosening the bolts on one side of the flange and then move to the other side. Make sure to loosen the bolts gradually to avoid any damage to the flange or the pipes.
- Remove the bolts and nuts: Once the bolts and nuts are loose, remove them from the flange adapter. Keep the bolts and nuts in a safe place for reuse or replacement.
Step 4: Separate the Flange Adapter from the Pipe or Equipment
After removing the bolts and nuts, you can separate the flange adapter from the pipe or equipment. Here's how you can do it:
- Use a pry bar: If the flange adapter is stuck to the pipe or equipment, you can use a pry bar to gently separate them. Insert the pry bar between the flange adapter and the pipe or equipment and apply gentle pressure to loosen the adapter.
- Cut the pipe: If the adapter is connected to the pipe using a permanent joint, you may need to cut the pipe near the adapter. Use a pipe cutter or saw to cut the pipe. Make sure to cut the pipe at a safe distance from the adapter to avoid any damage to the adapter.
- Remove the adapter: Once the adapter is loose, remove it from the pipe or equipment. Be careful not to damage the flange or the pipes during the removal process.
Step 5: Inspect the Flange and the Pipes
After removing the flange adapter, it's important to inspect the flange and the pipes for any damage or wear. Here's what you should look for:
- Check the flange: Inspect the flange for any cracks, corrosion, or damage. If the flange is damaged, it may need to be replaced.
- Check the pipes: Inspect the pipes for any damage or wear. Look for cracks, leaks, or corrosion. If the pipes are damaged, they may need to be repaired or replaced.
- Clean the flange and the pipes: Use a wire brush or a cleaning solution to clean the flange and the pipes. This will help to remove any dirt, debris, or corrosion from the surfaces.
Step 6: Install the New Flange Adapter
Once you have inspected the flange and the pipes and cleaned them, you can install the new flange adapter. Here's how you can do it:
- Choose the right adapter: Make sure to choose the right flange adapter for your application. Consider the size, material, and pressure rating of the adapter.
- Position the adapter: Place the new flange adapter on the pipe or equipment and align it with the holes in the flange.
- Insert the bolts and nuts: Insert the bolts and nuts through the holes in the flange and the adapter. Make sure to tighten the bolts and nuts gradually to avoid any damage to the flange or the pipes.
- Check the alignment: Use a level or a straightedge to check the alignment of the flange adapter. Make sure the adapter is level and straight.
- Tighten the bolts and nuts: Once the adapter is aligned, tighten the bolts and nuts to the recommended torque specification. Use a torque wrench to ensure that the bolts are tightened to the correct torque.
Step 7: Test the System
After installing the new flange adapter, it's important to test the system to ensure that it is working properly. Here's how you can do it:
- Turn on the system: Open the shut-off valve and turn on the system.
- Check for leaks: Inspect the flange adapter and the pipes for any leaks. Look for any signs of water or gas escaping from the joints.
- Monitor the pressure: Use a pressure gauge to monitor the pressure in the system. Make sure the pressure is within the recommended range.
- Check the flow: Check the flow of fluid or gas in the system. Make sure the flow is normal and there are no blockages.
Conclusion
Removing a Poly flange adapter for replacement may seem like a daunting task, but with the right tools, safety equipment, and knowledge, it can be done safely and efficiently. As a Poly flange adapter supplier, I'm committed to providing high-quality products and excellent customer service. If you have any questions or need assistance with your flange adapter replacement, please don't hesitate to contact me. We can discuss your specific requirements and provide you with the best solutions for your application. Whether you need a HDPE Female Threaded Adaptor, a Male Adapter HDPE, or a Male Thread Adaptor HDPE, we have a wide range of products to meet your needs. Let's start a conversation and explore how we can work together to ensure the success of your projects.
References
- "Piping Handbook" by Cameron Engineering and Associates
- "Flange Design and Engineering" by Robert E. Plotz
- Manufacturer's instructions and guidelines for Poly flange adapters


